Questo invece è il readme di preinstallazione che credo sia quello che dicevi tu

giusto??
Copyright 2004 by ELBOX COMPUTER
Mediator Multimedia CD rev. 1.26EN
Welcome to the Mediator Multimedia World.
This package will give you the option of using excellent sound
and TV cards in your Amiga fitted with the Mediator busboard.
Additionally, you will find here the fully-working drivers for
the Voodoo 4 and 5 graphic card families and drivers for
the Fast Ethernet 100Mbps PCI cards.
Licence
By using this software, you are agreeing to be bound by the terms
and conditions of the License Agreement (Licence.txt).
Registration
To register, send an e-mail message to
[email protected] with
"subscribe MM CD" in the subject line. In the body, give the CD serial
number (see the CD-ROM), your full name, e-mail address and where you
have purchased the MM CD pack.
How to install this CD-ROM software
1. Install the hardware key following the instructions on the package.
2. Use the enclosed automatic installer to install the required
software components.
3. To configure the Mediator variables use the MedConfig script.
You can always find the info about current Mediator drivers at:
http://www.elbox.com/downloads_mediator.html
The current info on supported PCI card is available in
the Mediator Driver Guide at
http://www.elbox.com/mdg.html
TV DRIVERS
To use the TV Drivers, please check that you have a Voodoo card installed.
The enclosed drivers support the most popular TV cards based on the
FUSION 878A and 879A as well as Bt848A and Bt849A chipsets. For the
complete list, see the TVprefs drawer.
Automatic TV Drivers installation:
Follow the installer scripts.
Manual TV Drivers installation:
1. Copy tv.library to the Libs: drawer.
2. Copy the appropriate TV card prefs file to Envarc:Mediator.
Change its name in Envarc:Mediator to TV.prefs.
Note: TV.prefs file defines all the details of the specific TV card
including RF frond-end model and GPIO lines settings as well
as layout of audio connections.
Note: If, despite selecting the TV.prefs file appropriate for the
given card, only external video inputs are working, and
switching to the TV program results only in a bluish or snowy
window, it means that the card has an RF front-end installed,
which is not standard for this card. If this is the case,
select the proper frond-end in the Tuner preferences file
in Envarc:Mediator drawer, which corresponds with the
description in the card's front-end (the metal box).
Note: If there are no problems with TV image, but sound is missing,
it means that a wrong TV.prefs file has been selected.
Change it for another, corresponding with the name in the
TV card's package.
3. Copy the TV file from the appropriate drawer in the TVsystems
area to the C: drawer.
4. Copy Broadcast and Cable TV Channels setting files appropriate
to your location to any selected drawer on your HDD.
Note: After installing the drivers, remove the CD-ROM from
the drive.
Customising your TV desktop:
Leave out the TV icon from the C: drawer.
This icon will be used for adjusting image parameters
(size, contrast, brightness, sat_u, sat_v, hue, others).
TV program parameters:
PLL: channel frequency [MHz] x 16,
VIDEO_SRC: 0-TV tuner, 1-external (video-in), 2-optional
(s-video b&w), 3-optional, 65638-optional (s-video),
65639-optional
AUDIO_MODE: 0-tuner, 1-radio, 2-external, 3-internal, 4-mute
CONTRAST: from 0 to 255, default 108,
BRIGHT: from 0 to 255, default 128,
SAT_U: from 0 to 255, default 90,
SAT_V: from 0 to 255, default 90,
HUE: from 0 to 255, default 128,
SIGNAL_FMT: 1-NTSC_M, 2-NTSC_MJ, 3-PAL_BDGHI, 4-PAL_M, 5-PAL_N,
6-SECAM_L, 7-PAL_NC
SIZE: from 1 to 8; default 4,
BACKDROP: TV as a backdrop
FM: radio,
FULL_FRAME: full TV screen (greater than the regular TV screen)
CLOSE: close TV window or backdrop
FREQ_STEP: 0-62.5kHz, 1-31.25khz, 3-50khz
Leave out the icons of the Broadcast Channel drawer and the TV Cable
channel drawer icons. The complete set of channels available in your
location is provided in these drawers: just click on the channel icon
to set on the appropriate TV program.
As not all the frequencies are used by broadcasting stations, we
recommend renaming icons for the corresponding TV channels (e.g.
CH27 to MTV) and removing all the other icons, which are not
supported in your location.
Note: The backdrop color, which is replaced by the backdrop TV screen
is specified in Envarc:Mediator/Background
To be able to watch TV, use the screen modes, which support the overlay
function: 16-bit PC, 24-bit BGR or 32-bit BGRA.
If opening TV is attempted in the mode which does not support overlay,
the TV program will display the following message:
Error: p96PIP_OpenTagList () failed.
This message means that the Picasso96 system is not able to open the
overlay window.
Under certain situations, the P96 system may also refuse opening
the window due to the error in comunication of the Picasso96
system with AmigaOS3.9.
To prevent this error coming up, it is usually enought to set the Icon
Quality to GOOD in Workbench prefs (instead of BEST). Also, when the
system is started, do not keep the CD_ROM in the drive.
Note:
Instead of using TV command directly, you can control TV screen
parameters with the GUI written by 3rd party developers.
We recommend:
the TvR program by Robert Krajcarz
file:
http://www.ppa.ltd.pl/software/download/tvr.lha
web:
http://www.ppa.ltd.pl/software/software-tvr.html
and
the SuperTV program by Peter Gordon
file:
http://www.petergordon.org.uk/files/stv_1-0.lha
web:
http://www.petergordon.org.uk
VHI STUDIO DRIVERS
The Mediator Multimedia CD includes drivers for the VHI Studio program
<http://www.vhistudio.de>
Install TV.vhi according to VHI Studio program manual.
SOUND DRIVERS
To use the Sound Drivers, please check that you have a Voodoo card
installed. The enclosed sb128.audio AHI drivers support all the
most popular Sound Blaster PCI128 sound cards based on the ES1370,
ES1371, ES1373, CT5880 and EV1938 chipsets and Sound Blaster 4.1
Digital sound cards. The fm801.audio AHI driver supports sound cards
based on Fortemedia FM801-AU chipset.
To use the sound card you have to install the AHI sound system first.
Automatic TV Drivers installation:
Follow the installer scripts.
Manual Sound Drivers installation:
1. Copy mixer.library to the Libs: drawer.
2. Copy sb128.audio (fm801.audio) to Devs:AHI
3. Copy SB128 (FM801) to Devs:AudioModes
4. Copy Mixer, Mixer.info, Mixer.guide, Mixer.guide.info,
mixerlogo.iff to any selected drawer on your HDD
(default Sys:prefs). Read the Mixer Guide before using
the Mixer GUI.
Note:
Instead of the Mixer GUI by Richard Brooklyn included in
the MM CD you can control your sound card mixer with the GUI
written by 3rd party developers.
We recommend:
GhostMix by Matthew Allatt
file:
http://aminet.net/hard/drivr/GhostMix.lha
web:
http://homepages.gotoadsl.co.uk/~allattm/Amiga.html
and
Taski Mixer by Pawel Filipczak
file:
ftp://taski.com.pl/pub/TaskiMixer.lha
web:
http://taski.com.pl/loader.php
Customising your Sound desktop:
Leave out the Mixer program icon.
Note: Some Codec AC'97 chips do not support the 3D control
properly. If the sound is played back improperly,
switch off this function (Mixer: 3D control - mute).
Note: The Fortemedia fm801.audio driver supports the following
Mediator models: Mediator PCI 3/4000T, Mediator PCI 4000D,
Mediator PCI 4000Di, Mediator PCI 4000, Mediator PCI 3000D,
Mediator PCI 1200SX, Mediator PCI 1200LT4, Mediator PCI 1200LT
and Mediator PCI ZIV. The Fortemedia fm801.audio driver does
not support Mediator PCI 1200 busboard.
If you want to use Fortemedia FM801-based card in A1200
upgrade your Mediator PCI 1200 to Mediator PCI 1200SX.
GRAPHIC DRIVERS
The enclosed 2D graphic drivers support the following cards in the full
scope of their functions:
Voodoo Banshee 16MB
Voodoo3 2000 16MB SDRAM/SGRAM
Voodoo3 3000 16MB SGRAM/SDRAM
Voodoo4 4500 32MB
Voodoo5 5500 64MB
Automatic Graphic Drivers installation:
Follow the installer script.
Manual Graphic Drivers installation:
Copy the enclosed Voodoo.card to Libs:Picasso96 drawer
FAST ETHERNET DRIVERS
The enclosed Fast Ethernet Drivers support the RTL8139 based 100Mbps cards.
Automatic Fast Ethernet Drivers installation:
Follow the installer script.
Manual Fast Ethernet Drivers installation:
Copy enclosed FastEthernet.device to Devs:Networks drawer
---------------------------------------------------------------------
Upgrading policy
Upgrades will be available by e-mail only to registered users
of this MM CD package (see the registration note in the beginning of
this file).
---------------------------------------------------------------------


 .
.
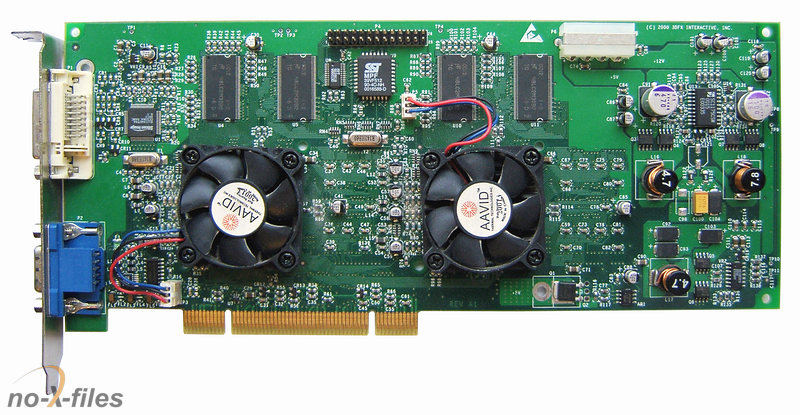
 (provvisoria) e nel frattempo me ne sono disfatto della precedente e ho ordinato un'altra voodoo5 pci.


 a differenza di questa che ne ha solo una?